Uploading Your Deceased Suppression Files
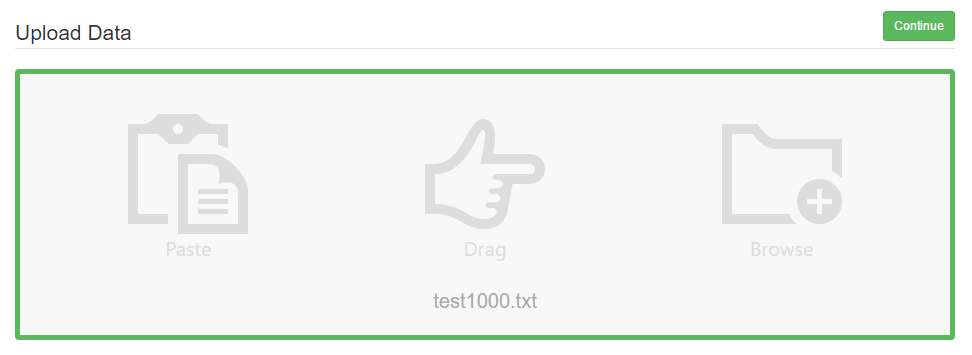
Users can upload deceased suppression files right from our homepage. Upload your file one of three ways: Paste, Drag/Drop, and Browse.
- Paste: User should 1) open their file; 2) copy all rows including the header; 3) and paste into the Upload Box. User should paste near the Copy/Paste icon.
- Drag/Drop: User should 1) access their file and drag into the Upload Box. User should drag the file to the Drag Icon in the Upload box to have a successful file upload.
- Browse Files: User should click the Browse Icon. Their File Explorer should open and allow the user to select the file they want to upload.
Please note: A files should be selected from its original file source. Using a file from your recent files or frequent folders will not upload properly.
When a file has uploaded successfully, the Upload Box will have a green border and the Continue Button will turn green. To continue processing your successfully uploaded file, click the green Continue Button.
Mapping Fields
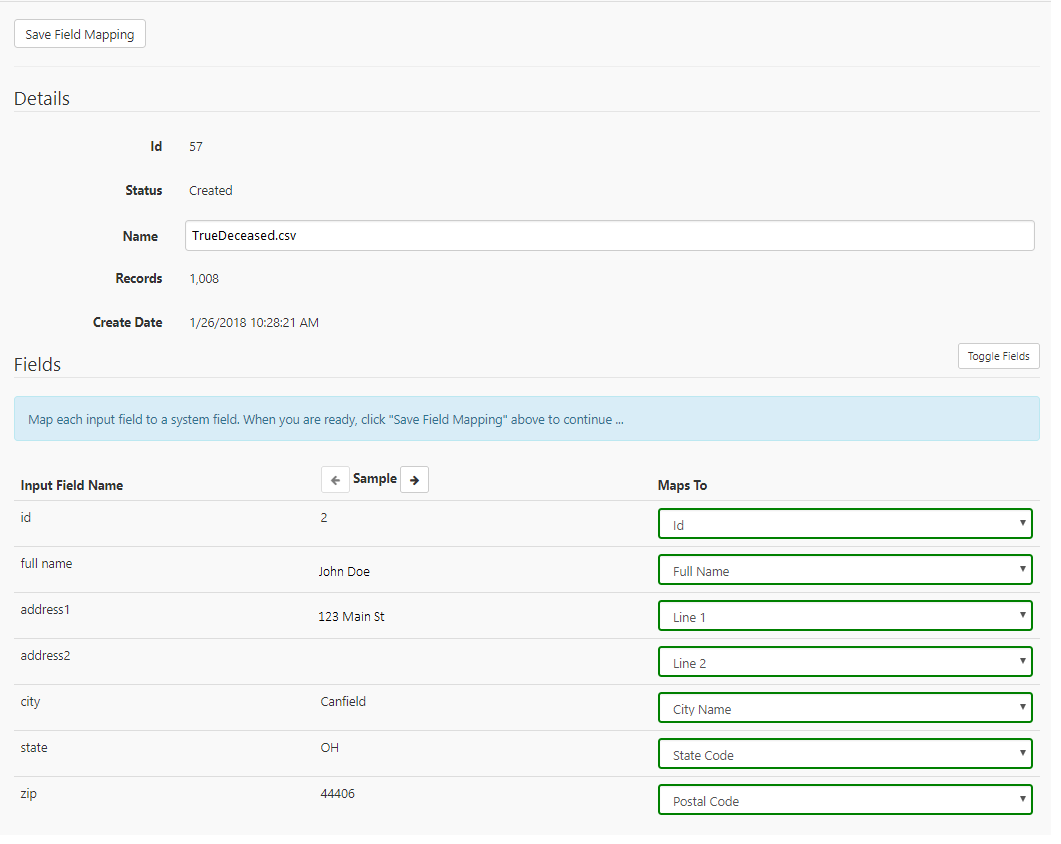
After clicking Continue, you’ll have to map your fields to our system fields. The app will try to automatically map your fields, but you should make sure to review them for duplicate mappings or missing fields.
To add Pass-Through fields during mapping, just map the field you want to retain to our Pass-Through field. If you don’t see it as an option, just click the toggle fields button to change your view.
If you receive an error, make sure you read the error and update your mapping to avoid the error again. To read about the errors you may encounter, check out our Errors section.
When you are done mapping, click the Save Field Mapping button located at the top left of the page.
Process Your File
Once you have uploaded and mapped your fields to our system fields, you are ready to process your file! To start processing, simply click the Process File button at the top of the page.
When your file is done processing, you will receive a notification at the top of the File Display page. You will also receive an email notifying you that your file processing is complete, so there is no need to stay on the page during processing.
Completed File
When your file is complete, make sure you check out your TrueDeceased Report. This will give you details as to what changes were made during processing, and it will also give you details about the data appended to your file. If you decide you would like to purchase, buy some credits and then export and download your file.
You can review our complete TrueDeceased input file guide here.
Give us a try...
Upload, Paste, or Drag & Drop your data file today for our deceased suppression services and receive your complimentary TrueDeceased Report - no credit card required.


